


Craft & Needlepoint Room - Setting up a Workspace

Not going to lie, a big perk of moving back to the Midwest was the ability to have more living space. My small, one bedroom apartment felt increasingly cramped over the years and I didn’t love having to constantly change over my dining room table for eating, sewing, crafting, working, and so on. So, when I was looking for a place in Kansas City, I was thrilled to be able to find a place that would allow me to have a dedicated workspace. However, outfitting a new workspace in the middle of a move was a little daunting (not to mention expensive). In this post I’m sharing how I’ve set up my workspace and organized some of my most used crafting tools so far. This space is very much a work in progress!
When I moved in October, the first priority was to set up a workspace and get all my supplies unpacked so I could start using them. Now that I’ve lived in the space, I’m excited to freshen it up with a new coat of paint, to hang a gallery wall of needlework and other sentimental (and whimsical) items, and to build out the workspace further.
Before I go on, I wanted to share a bit more of my intentions for the space. Much like my dining table, this space needed to be flexible. I need to be able to do computer work, sew, needlepoint, and craft while also having the ability to flex it into a guest room if needed. I envision spending a lot of time here (much like people hang out in a den/family room), so I want it to feel bright, colorful, and personal.
Counter Space
Knowing I would be using a counter or desk space a lot, I prioritized figuring out how to maximize the work area when I was planning out the room. I knew I would also need drawers or cabinets for easy access to frequently used items. A few options that I looked at, but didn’t pursue, for this included:
Custom countertops and cabinets from Ikea’s kitchen section
Custom closet cabinetry from a company like Closets by Design or California Closets
Thrifted cabinets from Habitat ReStore or Facebook Marketplace
A DIY work table made from lumber
Desk from a big box furniture store
While I was anxious to get the room set up, I didn’t know (and still don’t fully know) how I’ll use this space and thus was hesitant to make any significant or permanent investment. So, I opted to create a workspace using Ikea desk components since I could customize them to my space for minimal cost.
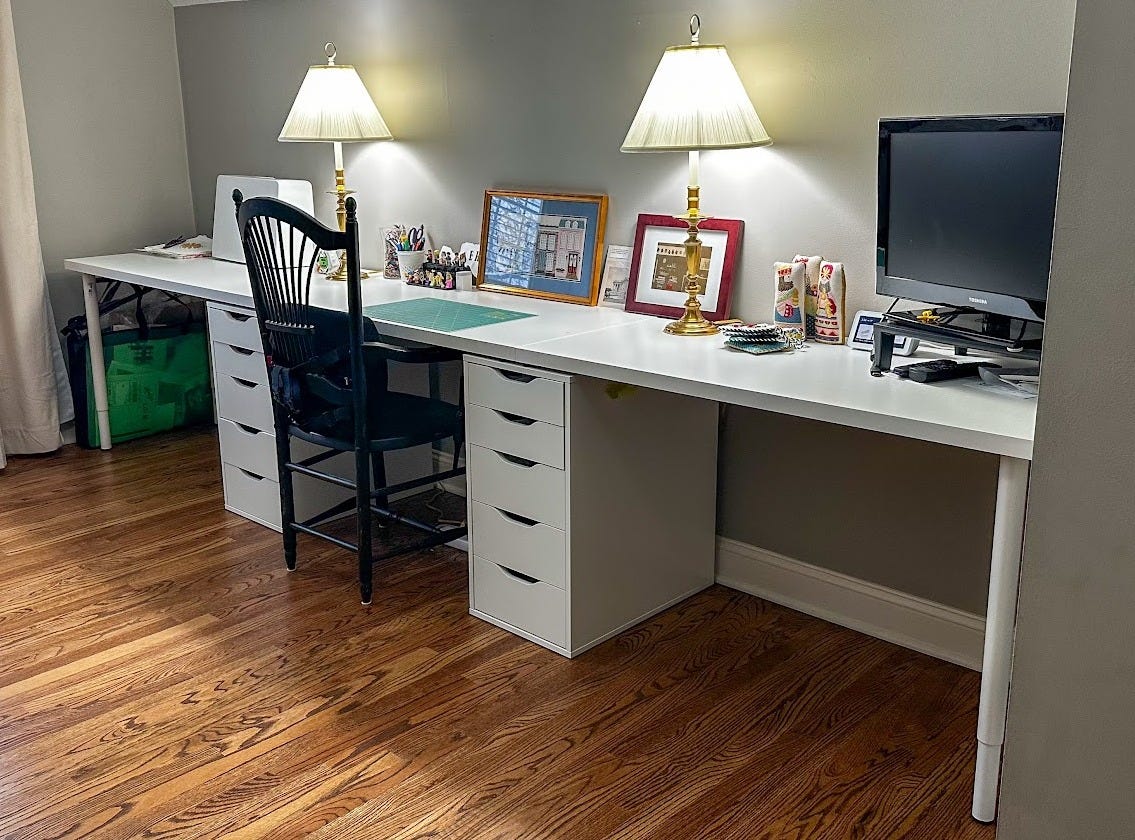
Here’s what I chose and why:
Three Lagkapten countertops (in the size 47 1/4” x 23 5/8”) - These countertops are lightweight and offer a lot of workspace, a perfect solution for my desk surface. In my room, three of the 47 1/4” x 23 5/8” countertops maximized the space the best. They do come in several sizes (and styles) and I recommend picking the sizes that work for your room. If you are using more than one countertop next to each other, consider using Velcro strips or 3M picture hanging tabs to join the counters together (and keep them from sliding apart).
Two Alex drawers (in the narrow 5-drawer option) - To build the base of my desk, I opted to use two drawer units underneath where the countertops join together. There are a few options for the Alex drawers, but I found the narrow 5-drawer option were both the best height for me and the most practical for organizing my items. These drawers were really simple to build and I was able to put both units together in one evening. One downside is that the slides that come with the drawers only come out so far. This means that the back few inches of the drawer become a bit of a black hole as you can’t see that space when the drawer is open. I wasn’t interested in purchasing third party hardware to allow for the drawers to come out further (a hack suggested by the internet), and opted instead to use drawer organizers (more on this below) to make sure I could easily access items.
Four Olov adjustable legs - For the remaining corners of the countertops, I stabilized them using two legs on each end. Ikea offers a few different leg options for desks but I liked that the Olov legs were adjustable. I find that when I prep items for sewing, a workspace at counter height is more comfortable. I like that I could flex this desk configuration into a counter height workspace by adjusting the legs to a taller height and adding feet to the Alex drawers.
Overall, I was able to get extra storage and nearly 142 inches of workspace for just over $300 retail. I had a moving code for $25 off $250 which helped reduce the cost. If you don’t have a moving code, you can get a discount code if you sign up for the Ikea family program (which is free). I love that I was able to create a large workspace, without too much expense, that can flex as my needs for the room evolve.
Seating
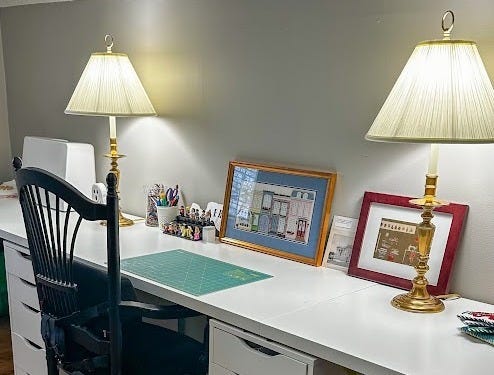
Thanks to the combination the desks and supports, I have separate zones for sewing, needlepoint, and computer work. For sewing, I usually sit in a vintage chair that I bought at a flea market a few years ago. While not pictured, I keep a more traditional roller chair in one of the other two work spaces and use when I go between desk areas for computer work and crafting. I have tried a few different roller chairs, but liked that this one was stylish and not too bulky. I’ve been using the same chair for a couple of years and have been pleased with the comfort and durability (it even survived the move!).
Lighting
Currently the room has one (very dated) ceiling fan with light in the center of the room. While I’m exploring alternatives, including adding additional overhead lights, I don’t want to commit to anything permanent until I live with the space for a while. So, I needed to find a way to add a lot of lighting to the workspace that wouldn’t necessarily be permanent. I crowdsourced recommendations for craft lighting, but many of the brightest options are expensive. Until I can commit, I grabbed a pair of lamps I already had and upgraded them by swapping the lightbulbs for LED daylight bulbs. These bulbs are incredibly bright and allowed me to increase the lighting at a fraction of the cost (it’s crazy how much difference the lightbulbs make). In an effort to make sure I don’t stay up all night crafting, these lamps are on a smart power strip and are set to turn off at a certain time each night (a clue that it’s time to head to bed).
Storage & Organization
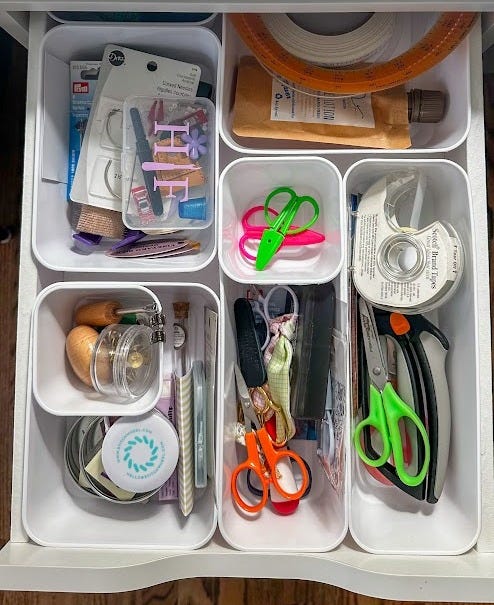
One of the best things about this room is that there is a sizable closet (I’ll share more details on this once it’s organized). However, I take advantage of the Ikea drawers to store small, frequently used items. Right now, I have one unit organized with sewing items, while the other one is organized with needlepoint items. To make the most use of the drawers, I purchased the Brightroom drawer organizers (which come in four sizes) to use in a few configurations within each drawer. While these bins are inexpensive at Target, I’ve found very similar bins at HomeGoods and TJ Maxx which work just as well. You can also use the drawers without organizers (and I have a few that don’t have any), but I find they keep smaller items together and tidy, while also helping reach the back of the drawers. A peek inside some of my drawers below:
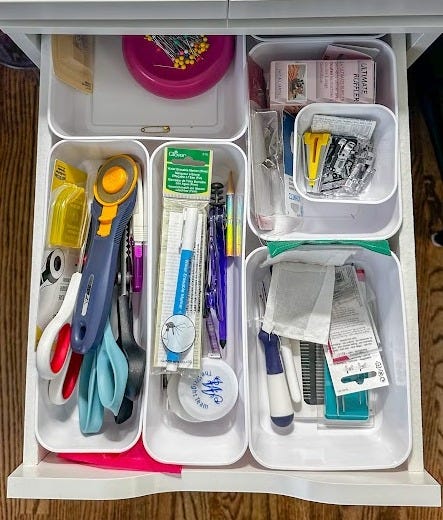
All of my scissors for stitching and finishing, rulers, tape, and about every needlepoint tool you could think of (needles, tacks, threaders, seam rippers, etc.) are contained in the top drawer. An example of why the bins are so helpful: if I need to access the bin in the back left, I can lift up the bin in the middle left and slide the one in the back forward to access.
Items for finishing are neatly organized in another drawer - batting, sewing clips, thimbles, thread, glue, and some leftover cording.
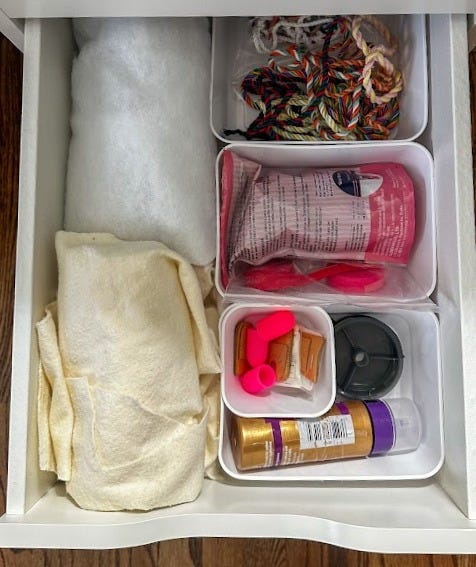
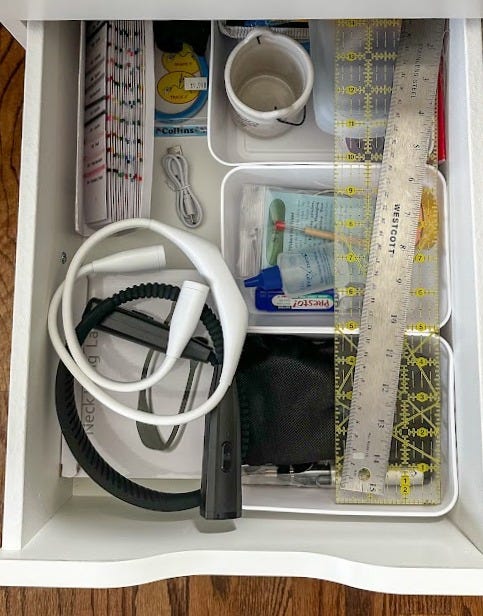
In another drawer I store additional needlepoint supplies including neck lamps, a color card, rulers, and items for ribbon work and turkey work.
Moving to the sewing drawers, I have all my sewing tools—including scissors, pins, seam rippers, measuring tapes, and all of the different feet attachments for my sewing machine—stashed in the top drawer.
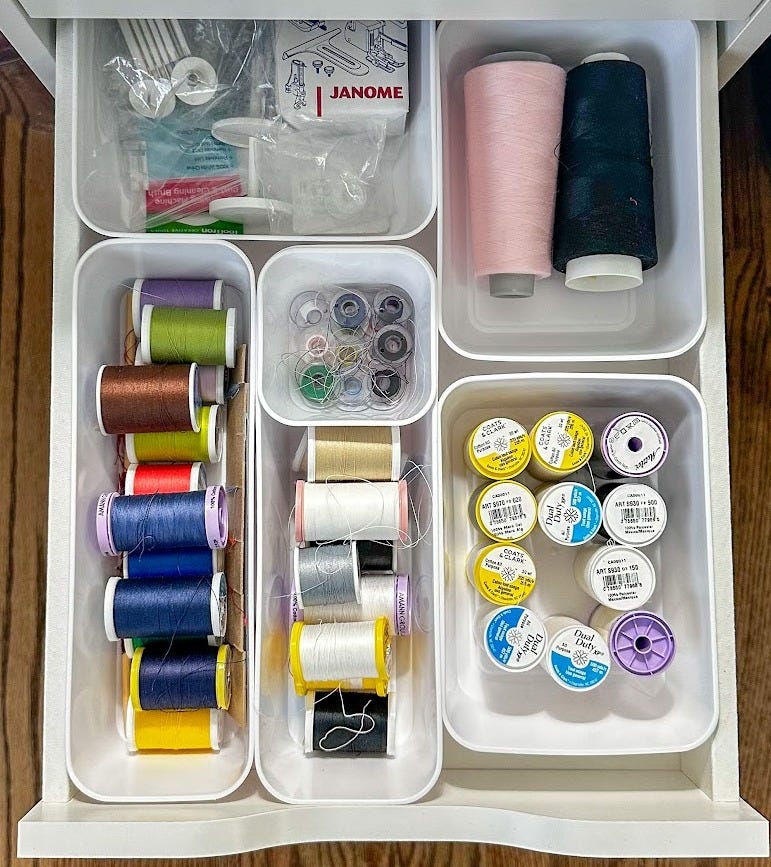
This drawer contains all of the thread and bobbins I use for sewing. It also contains some of the extra accessories for my machine that I don’t use as frequently.
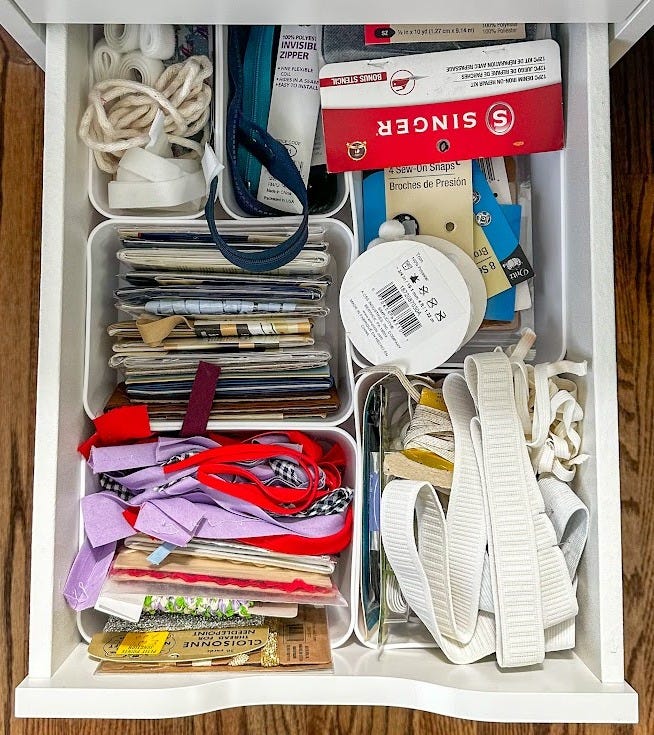
Trim, cording, piping, elastic, and buttons - oh my! You’ll find a little bit of everything, including items from my grandmother’s sewing collection, in this drawer.
Final Thought: This room is far from finished, but I wanted to share what I have set up so far in case this solution might work for you. I promise to share more about the closet space soon including glimpses of how I store all of the supplies for my many, many hobbies. I would love to hear more about your crafting space. What are some of your favorite things about your workspace (be it a couch, dining table, room, or someplace else)?
I see a neck light in your drawer. Are they really something I should get? Heading across the pond at the end of the month and was thinking of plane and hotel room stitching.
I think your room looks great! I also knit and needlepoint so I am trying to convert a bedroom into a craft room 😂