


Taylor Swift Needlepoint Finish How To

I, like so many needlepointers, am a Swiftie. My appreciation for Taylor started when her first album released and only grew as her catalog did. Needlepoint is a great way to commemorate events or special things in your life. Having been privileged enough to see the Eras tour in two cities, I knew I had to scoop up a needlepoint canvas or two to mark the occasions.
Canvas
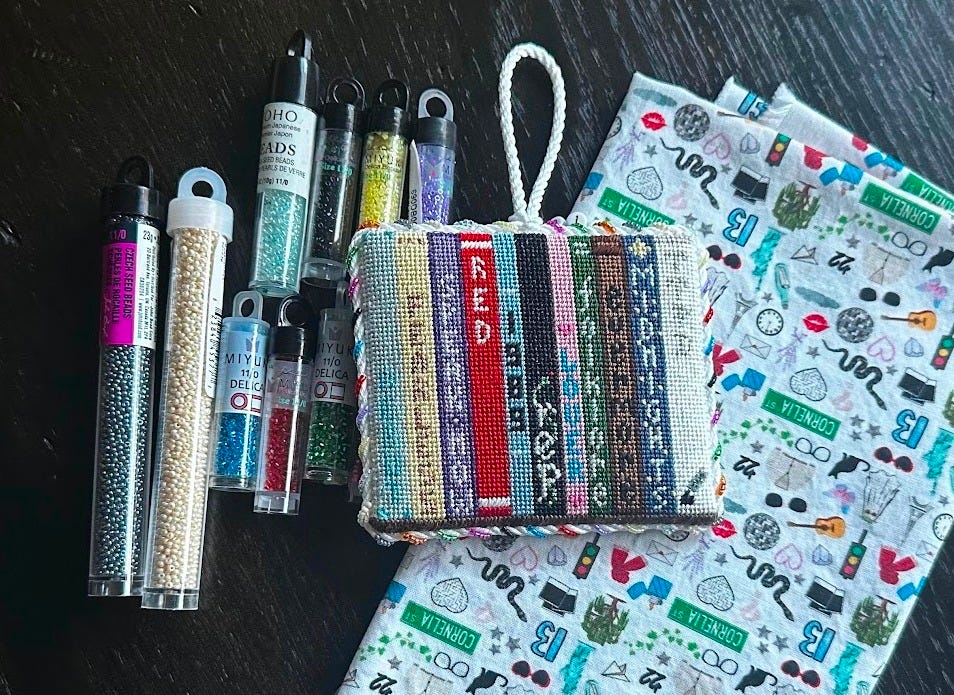
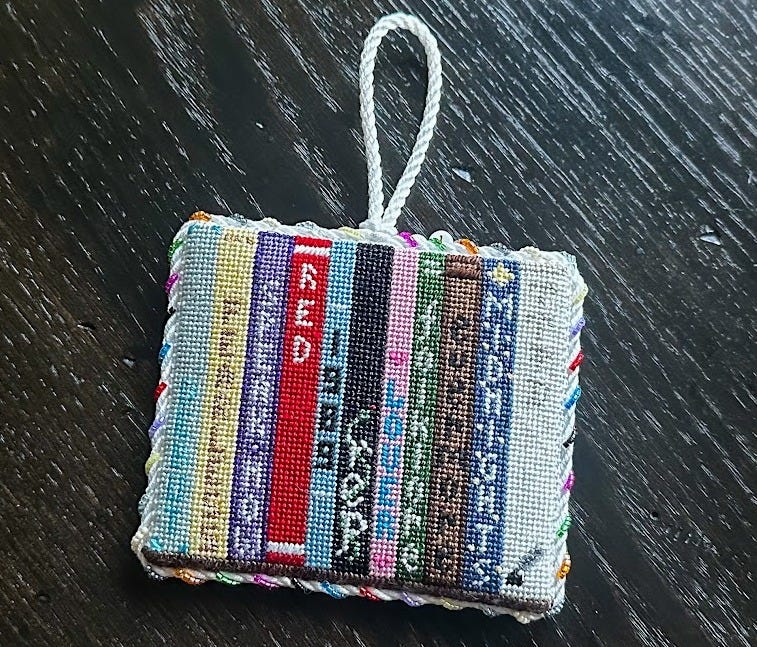
I have two Taylor canvases in my stash - Love MHB Studio’s Eras round and the stack of albums by The Book Canvas. For this tutorial, I’ve finished the latter canvas. Note: My stitching differs slightly from how the canvas is painted. I wanted my canvas to mimic the stack of CDs that I have collected over the years so I stitched each album on this canvas to be the same height.
Backing
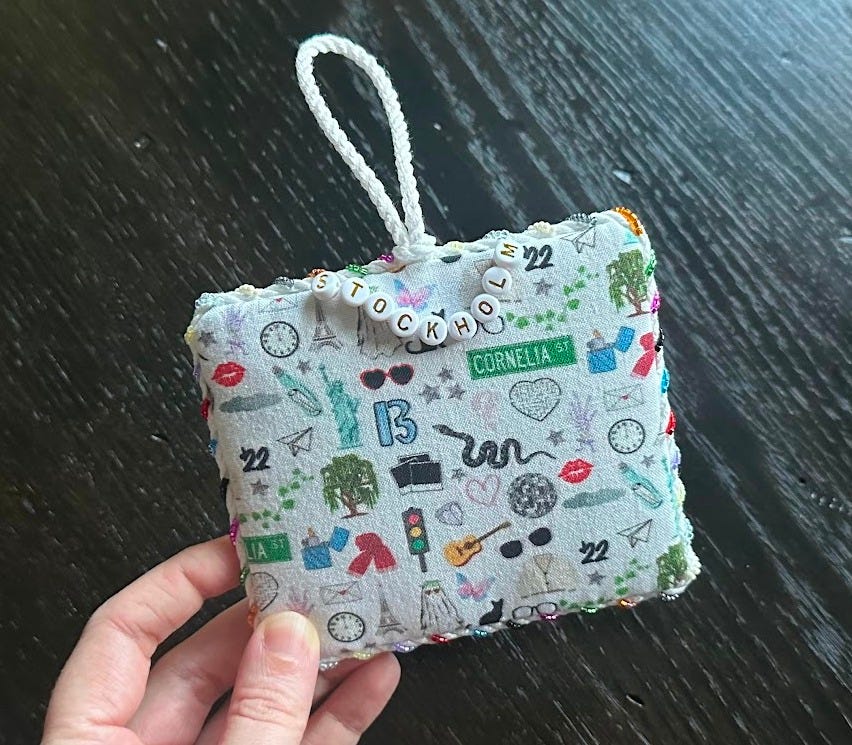
I went through so many sources to try and find the perfect fabric for this canvas. I ultimately settled on this icons fabric from Spoonflower because I liked the variety of albums represented and that the scale was right for an ornament. I purchased a fat quarter in Petal Signature Cotton, although buying a swatch would have been enough to finish an ornament.
Personalization
I knew I wanted to include a nod to the concert I saw in this finish. I toyed with a few different ways, but ultimately landed on including the name of the tour city on the back of the canvas using letter beads (I had some on hand that had been previously purchased from Amazon). After sewing the cording on, I used invisible thread to create a string of the letters before tying off.
Cording
I wanted this finish to be extra special, so I translated the rainbow beaded cording I had done previously into beaded cording in Eras colors. I made white cording for the base and pulled beads in 11 colors to create the beaded cording.
For a full tutorial on creating beaded cording, you can check out a previous post:

While I purchased some beads for this finish, I did use some that I already had on hand. I’m linking the beads I used, or ones similar to what I used, below. Given the amount of beads needed for this project, I opted to purchase from a big box craft store (using a coupon) to help minimize costs. I would also recommend checking your stash of beads to see what you may already own.
I had to use a mix of beads in size 11/0 to get all the colors needed for this finish. I am not able to link to a specific color of bead so I’ve shared a link and listed what color I recommend.
Debut - these beads in Light Sapphire Crystal
Fearless - these beads in Sun Glow Neon
Speak Now - these beads in Bright Purple Died
Red - these beads -in Cranberry
1989 - these beads in Dark turquoise blue
Rep - these beads in Opaque Black
Lover - these beads in Light Neon Pink
Folklore - these beads in Kelly Green
Evermore - these beads in Cactus AB Silk
Midnights - these beads in Gunmetal
TTPD - these beads in Ivory Pearl
Final Thought: One thing that I love about needlepoint is the ability to truly make it yours. I hope this post inspires you to make your finishes fun and celebrate not only your memories but also all the hard work that went into the piece. Do you have a favorite way to personalize your needlepoint finishes?

